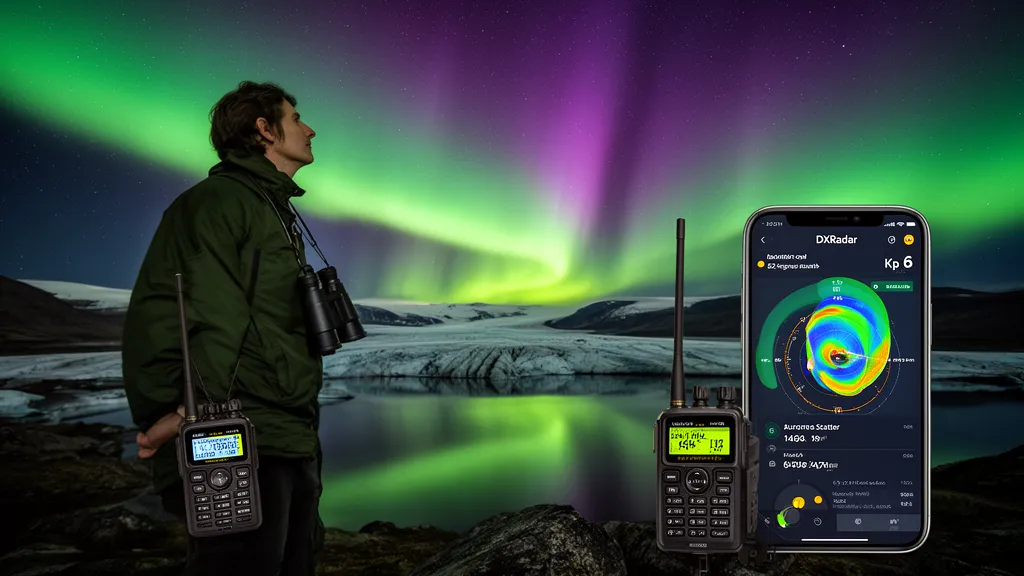
Operator's Verdict: The current planetary K-index is 0. Aurora is visible above 60° N at Kp 3+ and visible at mid-latitudes (50–55° N) at Kp 5+. Check the live aurora oval for the current OVATION probability map before making the drive to a dark site — and bring your 6m rig.
What Kp Level Do You Need at Your Latitude?
The single most important number for aurora planning is Kp, the planetary geomagnetic index published every three hours by NOAA SWPC. It runs from 0 (completely quiet) to 9 (extreme G5 storm). Aurora visibility scales with Kp in a predictable way: as Kp rises, the auroral oval expands equatorward, bringing the display to lower and lower latitudes.
The catch is that the relevant latitude is geomagnetic latitude, not geographic latitude. Earth's magnetic pole sits near Ellesmere Island, Canada — not at the geographic North Pole — so the oval is not centered on 90° N geographic. This asymmetry matters significantly for planning. A complete treatment of geomagnetic vs. geographic latitude is in the geomagnetic-latitude article, but the practical takeaway is in the table below.
| Geographic Region | Approx. Geomagnetic Latitude | Aurora visible from | Reliable display starts at |
|---|---|---|---|
| Northern Alaska, Svalbard | 65°+ N | Kp 1–2 | Kp 1 |
| Fairbanks AK, Tromsø, Reykjavik | 62–65° N | Kp 2–3 | Kp 2 |
| Anchorage, Helsinki, northern Scotland | 58–62° N | Kp 3–4 | Kp 3 |
| Edinburgh, southern Iceland, Juneau AK | 55–58° N | Kp 4–5 | Kp 4 |
| Dublin, Copenhagen, Vancouver BC | 52–55° N | Kp 5–6 | Kp 5 |
| London, Munich, Seattle WA | 50–52° N | Kp 5–6 | Kp 5–6 |
| Paris, Denver CO, southern Canada | 47–50° N | Kp 7 | Kp 6–7 |
| New York City, northern Spain, Chicago | 42–47° N | Kp 7–8 | Kp 7 |
| Texas, Florida, Southern California | 35–42° N | Kp 8–9 | Kp 8 |
Source: NOAA SWPC geomagnetic storm scale (G1–G5) equatorward oval boundaries. Kp thresholds are statistical; exceptional events may push aurora further south.
For mid-latitude operators (45–55° N), the G1 storm threshold at Kp 5 is the practical target. Below that, the oval is typically too far north to produce a display overhead. Above it, the oval expands and the display brightens rapidly. The May 2024 G5 storm (Kp 9.33) brought aurora to Florida and Texas — geographically at 25–30° N — an event that happens perhaps once per solar cycle.
Pro Tip: The DXRadar aurora dashboard shows the live NOAA OVATION aurora probability map updated every minute. Before making the trip to a dark site, check that the oval actually extends to your latitude — a rising Kp alone does not guarantee local visibility if the oval is still 500 km north of you.
When to Look: The 22:00–02:00 Window
The best aurora activity occurs between 22:00 and 02:00 local time, centered on magnetic midnight. This is not arbitrary — it reflects the structure of the magnetosphere. The nightside magnetosphere stores energy from the solar wind in the magnetotail. Substorms, which release this energy as sudden auroral intensifications, fire most frequently in the pre-midnight to post-midnight sector.
Magnetic midnight at your location differs slightly from clock midnight because it is based on the Sun's position relative to your geomagnetic longitude, not your time zone. As a practical approximation, assume the peak window is roughly 21:30–02:30 local time for most mid-latitude locations.
Early evening aurora (18:00–21:00) does occur, particularly during major storm events when the oval is unusually large and active. But if you have one night and want maximum probability, the 22:00–02:00 block gives you the best chance of catching a substorm intensification.
The secondary consideration is sky darkness. During summer months at high latitudes (above 55° N), the sky never gets fully dark between May and July. The midnight sun washes out all but the most intense displays. This is why aurora tourism concentrates in autumn and winter. For amateur radio purposes, aurora scatter on 6m does not require visual darkness — it works whether or not you can see the display — but visual observation is best in dark conditions.
Why Equinox Months Are the Aurora Season
March–April and September–October produce statistically more and stronger geomagnetic storms than the solstice months. This is not coincidence — it is the Russell-McPherron effect, a fundamental aspect of how the solar wind magnetic field couples to Earth's magnetosphere.
The efficiency of energy transfer from the solar wind to Earth's magnetosphere depends on the orientation of the interplanetary magnetic field (IMF). Earth's magnetic dipole is tilted relative to the ecliptic plane. Twice per year, near the equinoxes, the geometry aligns so that a nominally unstructured solar wind IMF has a greater southward (negative Bz) component when projected into Earth's magnetospheric coordinate system.
The result: the same solar wind that produces a G1 storm in December might produce a G2 or G3 storm in March simply because the geometry is more favorable. NOAA SWPC data on storm frequency shows a clear bimodal distribution with peaks in March–April and September–October (Russell and McPherron, 1973, Journal of Geophysical Research).
For planning purposes, if you have a choice of months for a trip to a high-latitude aurora viewing location, September and March are statistically the best bets. The equinox months also have naturally shorter nights than mid-winter at high latitudes, but darkness is still adequate by 20:00 local time.
Dark Sky: How Far from a City Do You Need to Be?
Aurora is faint enough that urban light pollution significantly reduces visibility. A Kp 5 display at 55° N latitude — the threshold for southern Scotland or central Canada — produces an arc of green light low on the northern horizon, perhaps 20–30 degrees of elevation at peak activity. This arc will be invisible from a city center but visible from a dark-sky site.
The practical minimum is to get at least 20–30 km away from major population centers. A light pollution map (e.g., Light Pollution Map at lightpollutionmap.info, based on VIIRS satellite data) will show you where the nearest dark-sky area is. Aim for Bortle Class 4 or lower for reliable observation of moderate displays.
During major storms (Kp 7+), the display becomes bright enough to see from suburban areas — the May 2024 G5 storm was photographed from city suburbs across Europe and North America. But you will see far more structure, color, and dynamics from a dark site.
The Moon is less problematic than city lights. A crescent to half Moon does not significantly wash out aurora. Full Moon is noticeable but still allows bright displays. Cloud cover is the variable you cannot control.
Pro Tip: Ham antennas make excellent foreground elements for aurora photography. A Yagi or quad loop pointed north, silhouetted against a green aurora display, makes a striking image. If you are running a portable VHF station anyway, set your camera on a tripod aimed at the antenna and the northern sky, and let it run time-lapse while you operate.
Camera Settings for Aurora Photography
Modern cameras with manual mode handle aurora well. The basic exposure triangle for aurora is: ISO 1600–3200, aperture f/2.0–f/2.8, and shutter speed 5–15 seconds. These are starting points, not fixed values — actual settings depend on display brightness, desired motion blur, and lens speed.
ISO: Higher ISO captures fainter aurora but adds noise. ISO 1600 is clean on most modern mirrorless cameras; ISO 3200 is acceptable. Above ISO 6400, noise becomes obtrusive unless you are using a high-end sensor.
Aperture: Use the widest aperture your lens offers. f/2.8 is the practical standard for aurora lenses; f/2.0 or f/1.8 lets you drop ISO significantly. Ultra-wide primes (20mm f/1.8, 24mm f/1.4) are the tool of choice for serious aurora photographers.
Shutter speed: Short exposures (5–8 seconds) freeze aurora movement and show dynamic structure. Long exposures (15–25 seconds) show more light but blur rapid aurora motion into a smear. During high activity (Kp 7+), aurora can move visibly within 5 seconds — short exposures are preferred.
Format: Shoot RAW. Aurora green responds dramatically to white balance adjustments in post-processing, and JPEG compression loses subtle color gradients.
Lens focal length: 14–24 mm gives the widest field and captures the full arc. A 50 mm captures detail in a specific section of the display. Bring both if you have them.
Smartphone Aurora Mode
Recent iPhones (iPhone 15 Pro and later with iOS 18) and Google Pixel phones (Pixel 8 and later) include dedicated aurora or astrophotography modes that perform well for moderate displays. They automatically use long exposures and stack frames. For a Kp 6–7 display from 55° N, a recent flagship smartphone will capture recognizable aurora without any manual settings.
For weaker displays (Kp 3–4 from 65° N), use the astrophotography night mode if available. Set the phone on a flat surface or small tripod for stability during the multi-second exposure.
Aurora Colors: What You Are Actually Seeing
The colors in an aurora are emission lines from specific atmospheric gases at specific altitudes. Understanding which color means what gives you information about auroral energy and altitude.
Green (557.7 nm, oxygen): The most common aurora color. Produced by atomic oxygen at 90–150 km altitude. This is the green arc and curtain visible in most aurora photos. It dominates at moderate Kp levels and is what you will typically see from mid-latitudes during G1–G2 storms.
Red (630 nm, oxygen): Produced by atomic oxygen at 200 km altitude and above. Requires more energetic conditions. Red aurora appears at the top of very tall curtains or as a diffuse red glow during major storms (Kp 7+). The May 2024 G5 storm produced vivid red aurora across southern Europe and the southern US.
Purple and blue (nitrogen ions): Produced by ionized molecular nitrogen at altitudes below 90 km. Seen along the lower border of active aurora during intense events. This is the same altitude band associated with the STEVE phenomenon (addressed in a separate article).
Pink at lower border: A mix of nitrogen blue and oxygen green at the transition altitude (~100 km) where the two emission regimes overlap.
For radio purposes: red aurora at high altitude corresponds to deeply penetrating energetic electrons that can enhance or disturb F2 propagation. Green aurora at 90–150 km is the regime most relevant to 6m aurora scatter, since the E-layer scattering volume sits in this altitude range.
Setting Up NOAA SWPC Alerts
NOAA SWPC offers a free alert subscription service. You can receive email or text message alerts when:
- A geomagnetic storm watch is issued (1–3 days lead time)
- Kp exceeds a threshold you specify (immediate notification)
- A G1, G2, G3, G4, or G5 storm is in progress
Sign up at services.swpc.noaa.gov/products/alerts-watches-and-warnings. Select the alert products relevant to aurora viewing:
- NOAA Geomagnetic K-index (Planetary) — get alerted when Kp reaches your chosen threshold
- Geomagnetic Storm Watch — advance notice of forecast G2+ storms
- Geomagnetic Storm Warning — confirmation that the storm has begun
Set your Kp threshold one level below what you actually need. If you are at 55° N and need Kp 5 for aurora, set the alert at Kp 4 — this gives you roughly one 3-hour Kp measurement window of advance notice to get to a dark site before the display peaks.
SpaceWeatherLive (iOS/Android, free) pushes the same NOAA data with Bz, Kp, and storm-status notifications. It also shows the current Auroral Oval map and a geomagnetic storm timeline.
Running VHF Aurora Scatter While Watching the Lights
The most productive combination for ham operators is to bring a portable VHF station to the dark-sky site and run aurora scatter on 6m while observing visually. The same geomagnetic conditions that produce aurora visible to the eye also produce the ionized E-layer columns that scatter 6m signals over 800–2,500 km.
The minimum practical portable VHF setup for aurora scatter:
- A 5-element or larger 6m Yagi (or a switchable 6m/2m combo beam)
- A transceiver with 6m capability (most modern HF+6m rigs work — ICOM IC-705, Yaesu FT-991A, Elecraft K3 with the 6m module)
- A laptop or tablet running WSJT-X for FT8 on 50.313 MHz
- Or, for CW operators, tune around 50.090–50.130 MHz
Point the beam north. This is non-negotiable for aurora scatter — you are not trying to point at the distant station, you are pointing at the aurora to illuminate the scattering volume. The other station does the same. Most aurora scatter contacts are between stations east and west of each other, both with beams aimed north toward the auroral oval.
During active aurora (Kp 6+), FT8 spots from EU–NA and NA–EU via aurora scatter appear on DXMaps.com within minutes of the oval reaching mid-latitudes. Monitor the map while you operate. When you start seeing 6m aurora spots reported from a region north of you, it is time to transmit.
CW aurora scatter signals have a distinctive raspy, buzzing quality — the rapid amplitude fluctuations of aurora-scattered signals impose a characteristic texture on the tone that experienced operators recognize immediately. FT8 handles this well because it is robust to phase and amplitude variations.
Pro Tip: Log aurora contacts in your logbook with the mode AU (ADIF aurora mode) and spot them to the DX cluster with "aurora scatter" in the comment. This helps build the community database of aurora scatter events and alerts other operators on the same path to try the mode.
Frequently Asked Questions
What Kp do you need to see the aurora?
At geomagnetic latitudes above 60° N (northern Alaska, Tromsø, Reykjavik), aurora is routinely visible at Kp 3 and sometimes at Kp 2 under very dark skies. At 50–55° N (Scotland, southern Scandinavia, central Canada), the threshold is Kp 5, corresponding to a G1 geomagnetic storm. Below 45° N, you generally need Kp 7 or higher for a visible display. The NOAA SWPC space weather scale provides the definitive Kp-to-storm-level mapping.
What is the best time to see the aurora?
The statistically best window is 22:00–02:00 local time, centered on magnetic midnight. This is when substorms fire most frequently on the nightside of Earth's magnetosphere, producing the brightest and most dynamic displays. Early evening aurora happens during major storms but is less common than the midnight-sector activity.
Why is aurora more common near the equinoxes?
The Russell-McPherron effect (documented in Journal of Geophysical Research, 1973) aligns Earth's magnetic dipole geometry with the solar wind such that southward IMF (negative Bz) coupling is most efficient near the March and September equinoxes. Statistically, March–April and September–October produce more and stronger geomagnetic storms than June–July or December–January.
What camera settings work for aurora photography?
Start with ISO 1600–3200, f/2.8 or wider, and 5–15 second shutter speed. Shoot in RAW format and use a wide-angle lens (14–24 mm). Tripod is mandatory for exposures longer than 2 seconds. Modern flagship smartphones with dedicated night or aurora modes produce good results for Kp 6+ displays at 55° N and above.
How do I get aurora alerts on my phone?
Sign up for free NOAA SWPC email or SMS alerts at swpc.noaa.gov. Set a Kp threshold alert one level below what you actually need to give advance notice. The SpaceWeatherLive app (iOS/Android) also provides push notifications for Kp thresholds, Bz excursions, and storm warnings.
Can I do aurora scatter on 6m at the same time as aurora viewing?
Yes — this is the ideal ham radio aurora outing. Bring a portable 6m Yagi, a rig with 6m capability, and a laptop running WSJT-X. Point the beam north, tune to 50.313 MHz for FT8 or listen around 50.110 MHz for CW. The same conditions producing the visual display generate the 6m scatter path. Both activities peak simultaneously in the 22:00–02:00 window.
Does aurora viewing require a completely dark sky?
Dark skies improve visibility significantly. For moderate displays (Kp 5 at 55° N), aim for at least 20–30 km from a major city, targeting Bortle Class 4 or darker. For major storms (Kp 7+), the display becomes bright enough to see from suburban locations. Cloud cover is the only truly uncontrollable variable; light pollution is manageable by driving to a dark site.