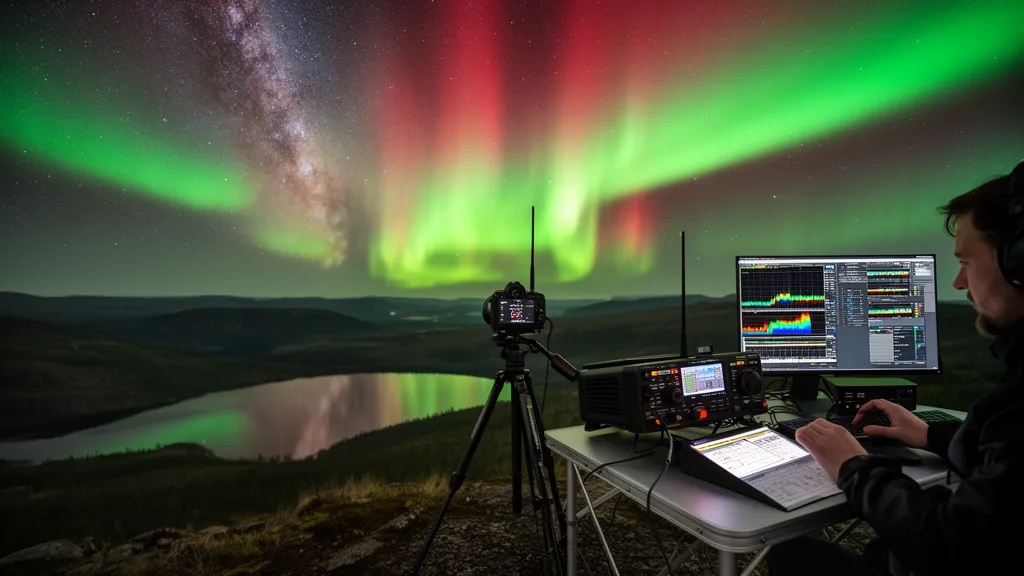
Why Ham Operators Are Natural Aurora Photographers
Ham radio operators have a built-in advantage when it comes to aurora photography: they already monitor space weather, watch Kp trends, and understand the relationship between solar activity and the ionosphere. The transition from “checking NOAA alerts” to “standing under an aurora with a camera” requires almost no additional effort — just a tripod and a dark site.
More practically, the same geomagnetic storm conditions that produce visible aurora also produce 6m aurora scatter, the VHF propagation mode that lets operators work 800–2,500 km contacts via ionized auroral columns. The visual display and the radio path share the same physical cause: structured ionized plasma at 100–120 km altitude in the auroral E-layer. You can see the scatter medium with your eyes, and you can work DX through it simultaneously.
The result is one of amateur radio’s most memorable operating experiences: a portable VHF station on a dark hillside, a camera running time-lapse on a tripod, and the northern sky lighting up green while your radio logs contacts that geography would normally prevent.
Camera Selection: What Equipment You Actually Need
Aurora does not require specialized equipment. Any camera with manual exposure control and the ability to mount on a tripod will work. The three factors that matter are sensor size, lens speed, and the ability to shoot RAW.
Mirrorless and DSLR cameras with full-frame or APS-C sensors are the standard choice. Modern full-frame mirrorless cameras (Sony A7 series, Nikon Z series, Canon EOS R series) produce clean images at ISO 3200 and even ISO 6400 — relevant for faint aurora at threshold Kp levels. APS-C sensors are slightly noisier at the same ISO but still capable for bright displays.
Micro Four Thirds cameras (Olympus OM System, Panasonic Lumix) work well at ISO 1600–3200. The smaller sensor means more noise at higher ISO, but modern processing compensates. They are also lighter — relevant if you are carrying both a camera and a portable VHF station.
Smartphone cameras: Recent flagship models have aurora modes. The iPhone 15 Pro and later with iOS 18 include a dedicated astrophotography capability that captures aurora adequately at Kp 6 and above from mid-to-high latitudes. Google Pixel 8 and later with Astrophotography mode performs similarly. For faint aurora at Kp 3–4, smartphones struggle to achieve the signal-to-noise needed to show the faint arc without obvious color fringing and noise. A dedicated camera with fast glass is the better choice for marginal conditions.
What you do not need: A specialized astro-modified camera (DSLR with IR-cut filter removed). These are for narrowband deep-sky imaging. Aurora is a broadband optical emission and photographs well with any standard camera.
The Exposure Triangle for Aurora: Starting Settings
Aurora photography is a long-exposure low-light discipline. The goal is to capture the maximum light from the aurora while minimizing noise from high ISO and blurring from excessive shutter speed. The classic starting point:
- ISO: 1600–3200. This captures most aurora at threshold brightness without excessive noise. Start at ISO 1600 and review the histogram; if the image is underexposed, increase to ISO 3200. For bright Kp 7+ displays, you may be able to drop to ISO 800 with a fast lens.
- Aperture: f/2.8 or wider. Wide aperture is the most important setting for aurora photography. At f/2.8, you admit four times more light than at f/5.6. A fast 24mm f/1.8 prime lets you use ISO 800 and shorter exposures compared to a zoom at f/4.
- Shutter speed: 5–15 seconds. This is the most variable parameter. During low-activity aurora (faint arcs, slow movement), 15–25 seconds captures more light. During high-activity aurora (rapidly moving curtains, substorm intensifications), 5–8 seconds freezes more structure. Long exposures during fast aurora produce blurred smears that lose the characteristic ray and curtain structure.
RAW format is mandatory. JPEG compression loses subtle color gradients in aurora imagery. Aurora green at 557.7 nm sits near the edge of typical white balance presets, and RAW allows precise color temperature and tint adjustments in post-processing. The difference between a good and a great aurora photo is often entirely in the RAW development.
Focus: Set manual focus to infinity. Autofocus fails in dark sky conditions. Use live view with maximum magnification on a bright star or distant light to set precise infinity focus, then tape the focus ring to prevent accidental movement.
Pro Tip: Set your camera to continuous time-lapse mode (interval timer) at 10-second exposures rather than manually triggering each shot. This lets you run the camera unattended while you operate your 6m station — you will capture the full development of the display rather than missing the peak while distracted by a radio contact.
Aurora Colors: The Physics of the Light Show
Each aurora color identifies a specific atmospheric emission at a specific altitude. Knowing the physics gives you more than a curiosity — it tells you about storm intensity and the altitude structure of the auroral oval, which directly correlates with radio conditions.
Green — 557.7 nm (oxygen, 90–150 km altitude)
Green is the dominant aurora color and the most commonly photographed. It is produced by forbidden oxygen emission at the 557.7 nm spectral line. This emission requires oxygen atoms to be excited to a metastable state, which occurs efficiently at 90–150 km altitude where oxygen is abundant but the atmosphere is still thin enough for the excited atoms to emit before collisional de-excitation.
Green aurora corresponds to the primary auroral E-layer zone that produces 6m scatter. When you see bright green overhead, the E-layer structure that scatters 6m signals is at maximum density. Green aurora from 45° N latitude corresponds to Kp 7+ and simultaneous peak 6m aurora scatter conditions.
Red — 630 nm (oxygen, 200 km+ altitude)
Red aurora is produced by low-energy oxygen emission at higher altitude, where the atmosphere is thin enough for the excited state (which has a long radiative lifetime of ~110 seconds) to emit before collisional quenching. This requires energetic electron precipitation that penetrates deeply.
Red aurora typically appears at the top of tall curtain structures or as a diffuse red glow during major storms. During the May 2024 G5 storm, red dominated aurora observations from southern Europe and the southern US — the deep penetration of energetic electrons at these latitudes produced red emission preferentially. Red aurora from mid-latitudes (below 50° N geographic) is a reliable indicator of G4–G5 storm conditions.
Purple and blue — nitrogen ion emission, below 90 km
The deep purple and blue tones visible along the lower borders of active aurora curtains are nitrogen molecular ion emission (primarily N₂⁺ first negative system). These emissions require the highest-energy electron precipitation, which reaches deepest into the atmosphere, below 90 km altitude. Purple aurora is a marker of extreme events and is rare from mid-latitude viewing locations.
Pink at lower border
The pink fringe at the lowest visible edge of aurora curtains is a mix of nitrogen blue and oxygen green at the transition altitude (~100 km). It is common in photographs of bright aurora but often appears pink or magenta rather than pure color because both emission systems are active simultaneously at this altitude.
| Color | Wavelength | Gas/Altitude | Storm Intensity Indicator |
|---|---|---|---|
| Green | 557.7 nm | Oxygen, 90–150 km | Kp 3+ at 65° N, Kp 6+ at 55° N |
| Red | 630 nm | Oxygen, 200 km+ | Kp 7+ typically required at mid-latitudes |
| Purple/Blue | ~391 nm | Nitrogen ions, <90 km | Extreme events, Kp 8–9 |
| Pink border | Mixed | Mixed ~100 km | Moderate to active (any bright display) |
Source: Vallance Jones, A. — Aurora (1974), D. Reidel Publishing.
Foreground Composition: Ham Antennas as Art
Ham radio antennas are excellent foreground subjects for aurora photography. They are:
- Directional and recognizable — a Yagi silhouetted against an aurora is immediately identifiable
- Relevant — the antenna that is beaming the 6m aurora scatter path is literally pointed at the light source producing the radio opening
- Structurally interesting — the lines of a directional antenna create geometric foreground contrast against flowing aurora curtains
For composition, position your tripod so the antenna boom and elements are in the lower third of the frame, with the aurora occupying the middle and upper two-thirds. Side lighting from a weak flashlight or distant light source gives the antenna dimension.
A quad antenna or delta loop makes a distinctive circular or diamond foreground shape against the vertical aurora curtain structure. A stacked dipole array creates strong parallel horizontal lines that contrast well with the vertical ray structure of active aurora.
If you are operating portable, the act of pointing the antenna north toward the aurora creates a natural narrative — the antenna is pointed at the source of both the radio signal and the visual display. Long-exposure photos with aurora in the sky and a station visible in the foreground are popular in the amateur radio community and document the dual-use operating session.
Timing and Planning: Maximizing the Overlap
The 6m aurora scatter window and the visual aurora window are the same window. Both are organized around magnetic midnight (roughly 22:00–02:00 local time) and both require Kp 5 or higher for mid-latitude stations. The planning process is identical:
- Set up NOAA SWPC K-index alerts — configure notification at Kp 4 (one level below your operational threshold) as advance warning
- Check the 72-hour geomagnetic storm forecast at swpc.noaa.gov — a G2 watch gives 24–48 hours to plan transport and equipment
- Check the OVATION aurora map at DXRadar — confirm the oval is extending toward your latitude before making the drive
- Scout the dark-sky site in advance — know the road, the parking, and the northern horizon view
- Arrive early — set up camera, polar-align if doing tracked astro, point the 6m Yagi north, start monitoring 50.313 MHz FT8
- Operate during the 22:00–02:00 window — substorm intensifications are most common in this sector
For equinox months (March–April, September–October), the statistical probability of a storm during any given week is highest due to the Russell-McPherron effect (increased solar wind coupling efficiency near equinox geometry). Planning a trip to a high-latitude aurora viewing site during equinox months maximizes the probability of catching a display and a 6m opening simultaneously.
Pro Tip: At active aurora latitudes (60° N+), the display often shows rapid movement — rays shooting up, curtains folding and rippling. Switch from 15-second to 5–8 second exposures as activity increases to capture the structure rather than blurring it. The WSJT-X screen recording on your laptop documenting the 6m contacts alongside the camera’s time-lapse creates a compelling archive of the same geomagnetic event from two perspectives.
Portable 6m Station Checklist for an Aurora Outing
The minimum useful portable VHF setup for combined aurora photography and scatter monitoring:
- Radio: Any HF+6m transceiver (ICOM IC-705, IC-7300 with 6m band, Yaesu FT-991A, Elecraft KX3/K3 with 6m module). The ICOM IC-705 is popular for portable use due to its compact size and built-in battery.
- Antenna: 5-element 6m Yagi (or larger). A two-element portable Yagi is a viable minimum. A beam is required — aurora scatter does not work well with omnidirectional antennas because you need to focus energy toward the aurora and receive scattered energy from the same direction.
- Laptop/tablet: Running WSJT-X for FT8. Interface cable from the radio to the computer for CAT control and audio.
- Power: Lithium iron phosphate (LiFePO4) battery pack for field use, or run off your vehicle.
- Compass or phone app: To point the beam accurately north. The aurora is to magnetic north, which is what matters.
Once set up, the camera runs autonomously on time-lapse while you operate the radio. Check the camera every 15–20 minutes to confirm the exposure is correct as aurora brightness changes. When the aurora peaks, you may need to decrease ISO or shorten exposure to avoid overexposure of bright structures.
Frequently Asked Questions
What camera settings are best for aurora photography?
Start with ISO 1600–3200, aperture f/2.8 or wider, and shutter speed 5–15 seconds. Shoot RAW format. Use a wide-angle lens (14–24 mm) and a tripod. For active aurora with fast movement, use 5–8 second exposures to freeze structure. For faint threshold aurora, increase to 20–25 seconds. Modern flagship smartphones with dedicated astrophotography modes are adequate for Kp 6+ displays.
What colors appear in aurora and what causes them?
Green (557.7 nm) is produced by atomic oxygen at 90–150 km altitude and is the most common aurora color. Red (630 nm) comes from oxygen at 200 km altitude and above, typically visible during major storms (Kp 7+). Purple/blue is nitrogen ion emission below 90 km, seen during extreme events. Pink at the lower border is a mixed oxygen-nitrogen emission around 100 km altitude. (Vallance Jones, Aurora, 1974.)
Can I photograph aurora with a smartphone?
Yes — recent flagship smartphones (iPhone 15 Pro with iOS 18, Pixel 8 with Astrophotography mode) capture aurora adequately during Kp 6+ displays at 55° N and above. For faint displays at threshold Kp levels or from mid-latitudes during moderate storms, a dedicated camera with fast glass (f/2.8 or wider) and full manual control produces significantly better results.
What latitude do I need to be at for aurora photography?
Above 60° N geomagnetic latitude (Tromsø, Fairbanks, Iceland), aurora is visible regularly at Kp 3–4. At 55° N geomagnetic (Edinburgh, southern Scandinavia, Vancouver BC), Kp 5 is the reliable threshold. Mid-latitude photographers at 45–52° N geomagnetic should plan trips to high-latitude locations during major storm forecasts, or wait for a G3 or higher event at home.
How do I combine aurora photography with 6m aurora scatter?
Set your camera on a tripod with an interval timer running, aimed north toward the aurora. Run your portable 6m station with a Yagi also pointed north, monitoring 50.313 MHz FT8 or 50.110 MHz CW. Both the visual display and the radio path are produced by the same ionized E-layer at 100–120 km. They peak simultaneously in the 22:00–02:00 local time window. The camera runs unattended while you operate, capturing the display throughout the session.
What is the best time of year for aurora photography?
March–April and September–October are statistically the best aurora months due to the Russell-McPherron effect, which increases solar wind coupling efficiency near the equinoxes. These months also have adequate sky darkness at high latitudes (unlike June–July) while providing more storm activity than the solstice months. The equinox windows coincide with the best 6m aurora scatter conditions for exactly the same reason.